I love making jam. There is nothing like popping open a jar of jam in the deed of winter and tasting all that yummy summer goodness! Many folks tend to over look this easy peasy homemade item out of fear that it is either too hard to make or canning scares them.
Well I’m here to assure you there is nothing to fear, as the process of both making the blueberry jam and canning it are well within your ability! In fact, this batch I made with my 11 year old son who wanted to make jam and can it for the county fair next month. And trust me, if he can do it, you can do it!
There are just four simple ingredients in our homemade jam, but it tastes AMAZING. You will need some blueberries, sugar, cinnamon and pectin. That’s it! You can use fresh picked, store bought, even frozen blueberries to make this recipe. We went with 6 pints of fresh blueberries and set to work…..
Before we even touched the blueberries, we had to get our jars and lids ready for canning it all up. You will need to sterilize your jars and lids in a boiling water bath and set them to the side to cool, so they will be ready when you need them later on.

Once the jars were ready, I had him wash the blueberries. Why? Well you should always wash produce that you yourself haven’t grown. You really have no idea what might be on them. But the washing also gives you a chance to pick out stems and any berries that just aren’t ripe enough.

Next I had him run all the berries through the blender. No blender? No problem! You can use a potato masher to smash them up! Either way, the blueberries need to be mushed up.

Now you could skip this next step if you don’t own a food mill or just don’t want to go through the process of removing more of the skins. I personally like a smoother jam, so after the berries were blended, I had him run the juice and skin through the food mill to help remove a lot of the skin. He might have gotten a little carried away turning the mill, but he cleaned up all his mess.

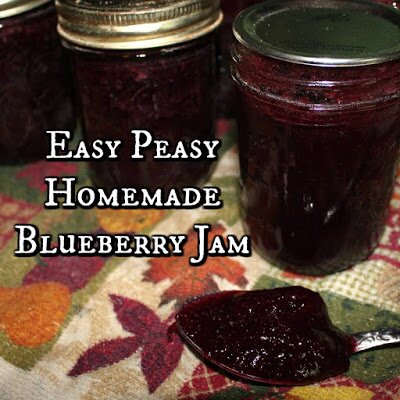
Our 6 pints of blueberries had now turned into around 8 cups of blueberry juice. Many recipes out there will say do only 3 or 6 cups of juice at a time. Well, I am sorry, but I don’t have time to make a bunch of little batches. When we make jam, we make jam! In the end we ended up with 7 jelly jars and a big ol pint jar because I had run out of jelly jars. This will be enough blueberry jam (along with the other flavors I make) to keep us set till next year.
I like make and keeping a variety of jams including blueberry, black berry, raspberry, and strawberry. Making a few different flavors mean I only have to make one big batch of each. By making one big batch of each kind, our family ends up with not only variety, but enough total jam to last all year.

Once the blueberry juice is ready, put it on the stove with 2 teaspoons of cinnamon and 3-4 cups of sugar. The cinnamon is optional, but trust me, you want it in there. It is not over powering and enhances the blueberry flavor to a whole new level.

Bring the pot to a boil and make sure to KEEP STIRRING. You do not want your jam to get a burnt flavor to it. Just stir till you no longer feel the sugar on the bottom, and then stir some more. Once you are at a boil, add in your one box of pectin. I use no sugar pectin, yes I know I use sugar, but using no sugar pectin helps to cut down on the sugar in the recipe which would have been over 7 cups of sugar for a batch this size!
Once the pectin has been added, bring the pot back up to a boil and keep stirring. I keep a spoon in a glass of ice water to test the thickness of the jam as it cooks. I scoop out a little jam with the spoon and being as it it cold, the jam cools a little faster then just blowing on it. If you do this every few minutes, you will start to see it cling to the spoon more as it thickens.
Once your jam is thickened, it is time to get it into the jars. I ladled it into the jars, and yes I got burnt by some hot jam this time. But seeing as how I couldn’t find my funnel, I wasn’t about to let my child fill the jars with lava hot jam. It was my own fault I got burnt, I was trying to ladle too fast. That being said, when you do not have a child up your hind end, you CAN carefully ladle the jam into the jars, but I recommend using a large mouth funnel for the job.

You could stop here and refrigerate all that jam, but no one wants to loose a ton of fridge space to jam! As I filled the jars, my son wiped the rims and placed the lids and rings on. You have to wipe the rims so the lids will be able to get a good seal in the water bath. Of course there was jam on the outside of the jars because I was ladling quickly and was messy, but it would come off in the water bath.

Some of the jars “pinged” as we were lidding them. That means they sealed themselves due to the temperature of the jam inside, Did I mention it was like lava? But just to make sure all the jars seal and will be shelf safe, you will want to run them through a water bath. Basically you are going to boil the crud out of the jars for about 5-7 minutes. The water needs to be OVER the lids while this is going on.
They make these amazing jar lifting tongs, and I highly recommend you have one. These things are the bomb diggity of getting those screaming hot jars out without having to have a lift insert in your canner. That means you can slip in a couple more jars every time you run, because the rack take up so much room in my opinion, and we all know I am opinionated. LOL

After 5-7 minutes, remove your jars from the water bath and place them on a towel on the counter. The “ping” sounds of them sealing should start right away. I don’t know about you, but ever time I hear a “ping” it makes me smile! As the jars cool, the jam will continue to thicken in the jars. Once the jars are cooled they are ready to hit the shelf of your pantry. And don’t worry if you have one lonely jar that doesn’t “ping.” Just pop it in the fridge and eat it first! And trust me, this blueberry jam is so good, you won’t want to wait to eat it!

My mother would LOVE this! 🙂
I would love for you to share this with my Facebook Group for recipes, crafts, tips, and tricks: https://www.facebook.com/groups/pluckyrecipescraftstips/
Thanks for joining Cooking and Crafting with J & J!
Thanks for the invite
We LOVE blueberry jam… and blueberry ANYthing! I haven't made blueberry jam for a while now and we really should… yours looks great! 🙂
My mom is a blueberry addict LOL Maybe that's where I got it from. Always have to have some on hand, just incase.
I have always wanted to try my hand in making my own jams and jellies, so I think I will give this a try 😀 Thanks for inspiring me!
-Jenna <3
Follow me back? The Chic Cupcake
You can totally do this!
What food mill do you use? I do the not so fun method of straining thru a wire mesh and there's got to be a better way.
It's actually an very old one I picked up at a yard sale for less then a dollar! LOL It's not perfect but definatly better then straining.
This looks so good and healthy. Thanks for sharing at C&C with J&J.
Enjoy!
That looks so yummy! Unfortunately the gypsy moths ate all of our blueberries again this year… 🙁 Pinning for next year.
Bad, bad moths!
Interesting that you put your jam in a water bath. I simply add it boiling hot to hot jars, add hot lids and seal immediately. It keeps for ages like that not in the fridge. #WasteLessWednesday
Most of them do seal up right away but just to be safe, we run them through